Enjoying this issue?
Get tomorrow's AI & engineering digest in your inbox — hand-picked, summarized, and always spam-free.
TLDR
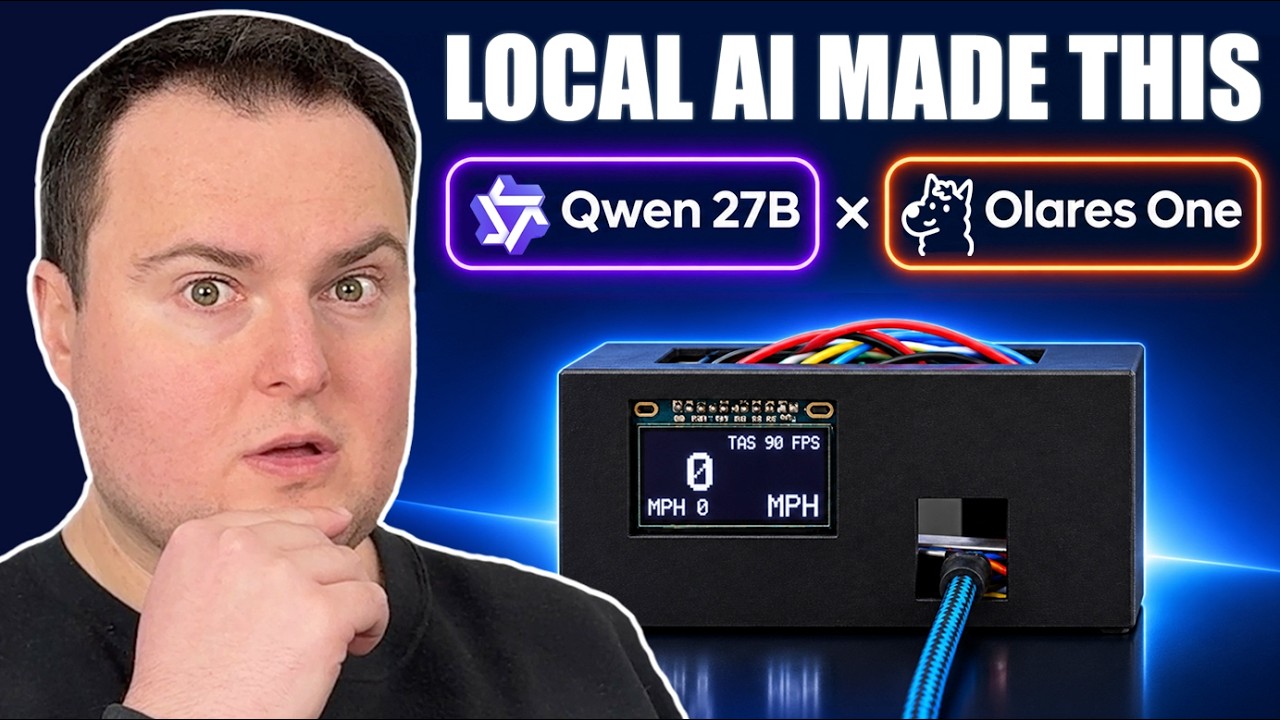
A local Qwen 3.8 27B model at 4-bit quantization running on an Olares 1 server successfully built a physical GPS speedometer from scratch, outperforming frontier models from 11 months ago on the same task. The build included 3D-printed enclosures, firmware for an ESP32, and a wiring diagram, all generated by the local model. The real story is that local AI has caught up to—and in some cases exceeded—older frontier models for hardware projects, and the Olares 1's new CLI enables natural-language control of the entire workflow.
Key points
A local Qwen 3.8 27B model at 4-bit quantization built a working GPS speedometer from scratch.
The local model outperformed frontier models from 11 months ago on the same hardware build task.
The Olares 1's new CLI allows coding agents to control the system with natural language.
The build included 3D-printed enclosures, firmware for an ESP32, and a wiring diagram.
The entire workflow ran locally on the Olares 1, including video generation with MiniMax H3.
Tools mentioned
Techniques
- 4-bit quantization
- image-to-image generation
- agent-to-agent communication
- natural language control via CLI
Stop scrolling. Start reading smarter.
Receive the day's most important AI & engineering updates in one concise email. No spam.
Transcript (captions)
as I sway this back and forth. See, this is cool. You know, you can go off-rid with this. You only need power. On January 1st, 2026, I put Claude Opus 4.5 and Chat GPT 5.2-codeex
to the test to see if they could properly build and create a physical vibecoded product, which leads us to the two items that we're holding today. Now, for today's video, we're going to be
testing to see if a local AI model can match or exceed what was a Frontier result just 11 months ago. So, today's video is going to be a physical Vibe code/h hardware build using the Olaris
1, a couple of fun components like an ESP32, some little screens, and some other things. And we're going to see if a local Quen 3.827B 827b at a 4-bit quantization can beat out frontier
models from 11 months ago. So, this is going to be done entirely using local AI. And I think this would be a pretty cool showcase of what some of these capabilities are with these local models
because we see a lot of coding only focused things. But I think bringing things into the physical world really opens up a lot of new possibilities and it can be pretty fun to actually hold in
your hand a little piece of hardware that was essentially created with the help of the human but also AI. So we're going to start off by just taking a look at the system we're going to be using
for today's video and then we'll get into some pretty hardcore vibe building which I am excited for. So let's start out by taking a look at the system we're going to be using for today's vibe build
as I have now dubbed it. This is the Olaris 1. And if this does sound a little familiar to you, then thank you cuz you've stuck around for a while. This first appeared on my channel
basically a year ago, maybe like 11.5 months ago, and it was back then a Kickstarter where it has now successfully completed. And if anyone is interested in this specific device, you
can just go and buy one from them directly now being that the Kickstarter has concluded quite a while ago. And for anyone interested, they are offering a special discount for viewers.
Additionally, there's going to be a Black Friday discount. So, if you want to stack some discount codes if you're interested in the Olaris 1, you can see a link in the description and pin
comment just for more pertinent information. Now, of course, also, as you may have guessed by my mention of the discount codes and links in the description, Olis was kind enough to
sponsor today's video where basically they liked my idea about the Vibe hardware build and wanting to use a local model to do so. So, they figured, hey, we could use the Olaris one for
this. And of course, I also figured that because that's today's video. So, with that, let's start out just by quickly familiarizing ourselves with the desktop right here. We're going to notice off
the bat that I'm actually accessing the system just through a web browser here on a completely different computer. I am currently using a Windows laptop. And that was one of the things about this
device, the Olaris, where it's essentially a local AI server. However, there are some changes now to the operating system. There have obviously been quite a few updates to its software
since I first featured it on the channel like a year ago. However, it now has the option to also be used locally like as a desktop computer. And being that it does have Windows support and you can play
games on it and things like that, it does make for a pretty beefy like mini PC for playing games and stuff like that. But it's cool that you can now just plug it in and use it as a desktop
as well, which maybe we'll take a look at later. But for now, we're going to just opt to use this through the web browser right here. And overall, the UI on this has always been rather simple
and minimal, which I kind of am a fan of. We have our dock on the left here, and just some of the installed applications, some of which will seem a bit more familiar and make sense once we
see what we're going to be doing today. We have things like Hermes agent, Blender, Comfy UI. So, we're also going to be creating some mockups and some maybe like a marketing video with
Miniaax's H3 video generation model just for whatever it is that we end up creating for today. With that though, we are now going to get into our first look at what we're going to be doing today,
which is basically the Vibe build. Now, for today's build, I have selected three components that one, I happen to have on hand, and two, I have some experience with being that this is kind of a future
iteration of something I've wanted to make for quite a while. So, the first component we're going to be using for today's video is a tiny little ESP32 board. This is a fairly cheap one, and
it doesn't have a lot of special options. However, that's good because it's widely accessible and available and it's got a lot of pertinent information out there about how to build things for
it. Following that, we're going to be using a Neo 6M, I believe, is the name for this. And this is a pretty interesting little thing because it is a GPS module. So, this will allow us to
actually track well, our device, which we haven't actually gotten into yet. Our speed, it's going to be a speedometer. Just uh sorry for the spoiler. So, this will basically allow our device to not
need any like network access or things like that. And we can use this for all of our speed measurements. It does have a fairly large attachable and detachable antenna, and it will work nicely with
the ESP32. Finally, because we're going to want to have a display readout that will actually show our speed for us, we're going to be using a tiny, and I believe this is called an SSD 1306. This
is a little 0.96 in OLED display. These are very common seen in a lot of things and again they have a lot of pertinent information and examples on how to properly use them with these devices. So
it's something that's totally palatable for a local model to have awareness of. So to begin, we're going to use open code for this where we're going to just initially start to talk to our local AI,
give it a bit of pertinent information about the project, what specific hardware we have on hand, and we're going to allow it to take the reigns in terms of how it guides it. if it asks us
follow-up questions and however it decides it wants to organize this project. So, I'm going to well, I could click open code right here, which would just open a nice little new session for
us. However, I do already have one open right here, and it is aptly named Speedo Project. So, with that, we're going to type in just the initial information about our project. And we see that we're
using a local Quen 3.827B. This is a 4-bit quantization of Quen 3.827B. And whatever performance we see today, keep in mind that sometime in the near
future, Quen 4 27B is going to come out. And based on the leaps of previous 27B Quinn models, it should be like a fantastic performing model. So basically, whatever we see here, there's
going to be a better one out soon that will use the same amount of resource that this one uses. So that's very exciting. So I'm starting out very simple here.
I'm giving it just enough information to know our overall goal, but I haven't given it specifics because part of the interesting portion of this, at least from my point of view, is seeing how the
model fields more of an open-ended project like this. All right, cool. And it is just verifying that the tool chain is available on the system, which I have insured beforehand just so we can kind
of focus more on building the hardware. And it's seeing, okay, we have open SCAD. Now, if you watch some of my model reviews, you may be familiar that we use that a lot to test their 3D modeling
capabilities with things that can be 3D printed. The Arduino CLI, which can be used to flash things for the ESP32. And it also does have ESP32 like things just to make sure we have available system
info for this. We have a checklist. Nothing is fabricated yet. Good. I need these from you before we start to build anything. The ESP32, it needs the exact board as well. Interesting. And
something I want to point out right here is this is showing some pertinent knowledge about these specific microcontrollers and boards, accessories, whatever you'd like to call
them. These are bits of information that are contained entirely within this local model, a tiny model that is basically being able to run entirely on a 24 gig card in this case. And it knows all
about these things. it can differentiate between some of the different popular GPS modules, the SSD 1306, how many pins does it have, what kind of power source. So, it's cool to
see that it has knowledge of some of these more niche things just built in. And this is why when folks talk down about local AI, maybe if you're needing like to maintain extremely large and
high-end code bases, sure it's not the best, but for a large amount of use case out there, even something like this, it has a very impressive amount of knowledge built in. So, I need to
actually give it some of the information it needs here. I think what I'm going to do is probably handmeasure some of these or just using a caliper and then I will feed it the information that it's asking
for. All right. So, I have all the measurements put in right here, as well as whatever additional info it wanted. And to answer its question about the
button, I've just said keep it fixed in miles per hour. And then that's something we could always change in software, and it could just reflash it. And then whatever happens to show right
here could be basically whatever we want. And this is still working. This will probably take a little bit of time as it's going to do whatever it's going to do right here. I think at minimum we
should expect to see a measurements JSON just so it has some basis with which to build the actual CAD files and we also can go back to here. So if we go in apps right here there is this dashboard where
we can actually monitor the performance or the system resource utilization right now on the ORIS being that it is working pretty hard right now running this model. So we can see right here CPU core
is not very utilized. Our GPU is so it's using 20.5 gigs of video RAM out of the available basically 24 and change. System memory is also being fairly heavily utilized as well just because we
have a bunch of other services going on as well. And we do have that 96 available. And then our disc is pretty happy and pods and all of these things. And we can actually click on these other
things to get more specific information about like fine grain stuff and what's going on right here. So it's cool to see this. And I just like being able to monitor like system resource. I don't
know. I just like like dashboards like this cuz they make me feel like a hacker. Oh, cool. And it did respond. So, it's writing our measurements. And it's going to need a bit more
information about this stuff, which makes sense, but it's also because this model is multimodal, we can always take a picture and give it to it as well if we need to, just of the PCB on the
board. It's basically writing the firmware right now. and it's noticing there were some issues with compatibility with one of the GPS APIs. So, again, this is like I I was kind of
expecting it to just start building the CAD stuff, which I was more eager to see than the firmware because I'm very interested to see how well it's able to actually build something that may or may
not fit these items. All right. So, I've given it all the info it needs, and I'm saying for the first try, I don't specifically want it to try to attempt the mounting hole
orientations in the perfect spot, as at least historically when trying this with now old models, that would always be just a complete disaster is their positioning of the actual like mounting
points for these sorts of things. All right, so after a little bit of time, we have some of our initial results right here. Just in terms of the actual files, we're going to 3D print. They are in
basically open SCAD format right now. So these are not print ready. They will need to be transformed into STL or something like that which we'll see in a bit. And something interesting I want to
point out is this section right here where it's saying it modeled the OLED screen. However, something we mentioned indicates that the screen width or height is not necessarily the full
height of that PCB. So, if I pull the screen right here, it basically knows that this screen portion is much narrower than the actual full height of the PCB. And it's saying that basically
the bezel it modeled will be like around here, which would look bad. And to that point, I actually have something right here, my laser blaster, that does have screens in it that are the same kind.
And we can see the bezel is much shorter and narrower than the actual full PCB, just so you don't see exposed. it would look like a gap and it would look bad. But the thing I want to point out for
that is that the model actually has enough pertinent knowledge about these things to know like hey the screen is not necessarily going to fit properly with what I've done here. So it asked
for a measurement of the actual screen dimensions itself. Just an interesting bit of capability to reinforce basically that this is a local model at a 4-bit quant that knows this and it's just kind
of cool to see. So, the updates it made based off of the initial measurements we gave it just about the screen height and then the height of the actual antenna have completed. So, now I'm telling it
to export these as STLs and then give us some render so we'll actually be able to visually see what it is that this has created. Okay, so there's our preview. Very
interesting. And I'm wondering if that's an old preview or if that's a newer preview. I need to Okay, 26103. Yes, that would be correct. Oh, no. We're in 26 11104 right now. Good. So,
these are older ones that we're seeing right here, which I am happy about. So, I would imagine that these are the newest ones. That's the lid, which understandably hasn't really changed
very much. Okay, so this is our cutout for the OLED display. And then this is our cutout right here for the USBC port that will provide power to this just from the Arduino, excuse me, the ESP. I
have to say this is workable. There's not really any flare to it or excitement. It's very functionoriented over form, but we can also look at these in Blender. So, that could be cool to
see as well. So, if we go back to the Oolaris right here, well, we've been on the Oolaris, but if we just go back to the homepage right here for our system, we can go into our installed
applications. I'm going to open Blender, and then we're going to view these just from within Blender as well, so we can kind of at least move around them. All right. So the item I had just opened in
Blender is not actually the printed files. These are just the things it had created. Oh, good. The base is there. So the only things that were visible were like this right here is the cube it made
to refer to that antenna, which I said was around 9 mm high and then a square that is 24x4. So it just made these to be able to check that they would physically fit inside the actual
component that it has created. So now we can hide these because we don't need those. and we're going to look at the base instead by itself. And there we see a nicely shaded and rendered iteration
of our base. So, this actually on first glance, it doesn't look bad. It's very utilitarian. It almost looks like a little house of some sort. However, it is kind of going to be a house for our
components. So, I think I'm okay with printing this just to see how well the screen fits in this hole and then we'll mount the ESP. So, for now, it's acceptable. And again, this may look so
simple, but I would like to redirect our attention to the results that were received with Frontier models however many months ago or year ago. And this is already turning out better, which is
quite something. And we do have these saved as STLs as well. So, the next step and something I would like to quickly showcase is a new ability in the 1.12.7 software. So the thing we're going to
showcase right here is a relatively recent addition to the Oolaris and this is the Oolaris CLI and gives the ability for an installed AI agent on our system like as they mentioned here codeex or
cloud code to control the OIRS with natural language. And this could be useful because say you get one of these but you're not really in tune with local AI and setting up some of the more
difficult portions of this or more advanced portions. You can essentially install this with a coding agent on your own system and then in natural language this can be used to completely set the
ORIS up. So you could say, okay, I want you to install Blender, get Miniax H3 running in Comfy UI, and then I want a STL file created in Blender, and then make a video rendition of it, like for
an advertisement purpose through Comfy UI. And your agent would be entirely controlling the Oolaris from start to finish just with natural language. So I now have codec open on this system that
I'm using the laptop not the ORIS but we've been accessing the ORIS just from if I do that and then can click properly on the screen. We've been accessing the Olaris the whole time from this specific
laptop. So now we have codeex open on it and we're going to go back in and I have a prompt for it just telling it to use the ORIS CLI to go and locate those STL files that are on the ORIS download them
onto this system right here and then basically from there we will put them in a printer slicer program and what we're going to see right here oh is that I didn't put fast mode on which I'm going
to do now. This is going to properly interface with the aris right here. So essentially codeex or any other coding agent that we opt to use claude code or perhaps something a little more exotic
like deep sea harness could basically interact with this and control the olaris just through natural language. So that's what is going on right here and the whole point of that CLI which is a
relatively new addition to the software stack. Perfect. And now we have our downloaded files. So we can actually start to get physical by 3D printing them. But I do
want to highlight one other cool thing about the CLI portion here where this is from within codeex and we're now going to have it perform something a little more exotic on the ORIS. So I'm going to
say so from right here I'm basically instructing the olaris just through codec and the olaris skill to open comfy UI use the minia z uh excuse me use the
alibaba the quen z image model take the screenshot that it had created of the base put it in there as an image to image prompt in comfy UI and then give me a render that takes that basic simple
yellow image of the base and turns it into something that looks like a retrofuturistic render for a product. So right here, everything we're going to see is the Olaris being controlled by a
coding agent. And again, that's the whole point of the CLI portion. And what is cool about like you don't need to understand the fine grain things about Comfy UI is intimidating. There's a lot
of nodebased workflows. I need to make sure that I'm properly setting everything right. This can just do it all for you in natural language just based off of a simple kickoff prompt
like that. So, while our image generation task is working right here, which apparently did not adopt the requested synth wave colors, at least for the first one, I am going to just
initiate the process of 3D printing our STL files that we do have downloaded now on this system. And we can see that our retro synth wave aesthetic is also being saved to the same directory that we've
saved the STL files in. Seems like we just got a second one. Let's just look at this real quick. Huh. Okay, that definitely changed the design of it a lot as well. So it wasn't a proper like
replication of it. Oh, okay. And that's just the base that it would use for the image to image. So interesting nonetheless. And perhaps would give us some depiction of how this will end up
looking. And let's see how long this will take to print. Now we're 34 minutes. Okay, I think we have our second version of this right here. Okay, we do. Again, it still
unfortunately didn't keep the actual shape and just basically reskin that. But nonetheless, it gives us a little bit of like a artistic depiction of what this could look like. Just also
showcasing some cool image generation with Z image Turbo through Comfy UI. So, I do have to say this ended up coming out a lot better than I expected it would just based off of what the
previous Frontier models had done. This really has no issues. If I were to nitpick, okay, I don't like that the USBC, excuse me, the micro USB port for the ESP32 is facing the same side as the
screen. It if that was flipped around, it'd be nicer cuz then the cable would be running out of the back of the mechanism. However, the only other really nitpicky thing would be that the
window or I say window, the spacic cutout for the OLED display is a little larger than it needs to be. It shows a bit more than just the actual screen itself. However, everything fits nicely
in here, even to the point where the actual GPS PCB could almost be press fit in and kind of stay in place. That was really nice to see. There's ample room for the antenna. And initially, on first
glance, I was thinking this is something we could cut down on the size of. However, in retrospect and looking back a bit, we do also have to factor in that there needs to be room inside to wire
everything. In the case of like what we saw here with our friend Claude, if you don't account for that, it may become something like some form of cable disaster like what we see in my hand
right here. So, I'm actually cool with leaving this as is for now. So, I'm basically asking it for a website to visually show us how to connect these wires to where they need to go. And once
everything is wired, we'll plug it into this computer and just try to flash the firmware and hope that it does work. All right, so we have our website for our wiring diagram completed here. Very
good. Well, I should probably look at it first before I make any definitive statements. Okay, look at that. Very good. We can individually select some of these wires and it highlights what the
specific connection schema for that one is, which is cool to see. So, if I quickly take a peek at this. Yeah, that's all there is. That doesn't actually seem too bad. Now, the big
blocker here is that this Neo6M GPS board does not have headers soldered onto it. headers being those little prongs that stick out, the four of them that that board should have. I'm
terrible at soldering. Genuinely terrible. And it's not like, oh, you just need more practice. I've done it a lot. I'm just absolutely atrocious at it. So, I'm going to have to kind of do
that and then we'll try. This is a fairly verbose page, which I do like to see. All right. I managed to kind of just mangle my way through soldering those four pins onto the GPS module. And
I'm actually going to put this URL onto my phone right here so I can bring this with me in another room and just actually have the wiring diagram there. And that is the cool thing about the way
that this is all set up and everything is even though it's on the ORIS which is behind me, I can access it just the way that this system is like designed to work from pretty much any device right
here. So even from this phone, which isn't even on my home network, it's just on a cellular network. I'm able to go and log into my Olaris and actually in this case see the wiring diagram. So, as
we see, I have this preemptively wired up. And the next step is basically to plug it into the computer. And then I think for this one, I may use the Oolaris CLI where basically through
codecs, I'm going to tell it to go and look at all of the work it's done in open code, install the dependencies to flash this Arduino on my own system because we're using it externally,
right? So, I'm using this through the laptop. I'm not actually physically using the ORIS. So, if I plug this into the computer I'm using right now, it's not plugged into the ORIS, which has the
tool chain and dependencies and things like that. Therefore, I will need those things installed on the computer that's currently being used just to interface with the ORIS. So, the first step is
just to plug this in. The first step is to find the USB port. I suppose I will just do as I had mentioned, which is just the codecs using ORI CLI. And we also saw a render
that had completed. As you recall, we had been looking at some renders for aesthetic choices. So, I'm telling it next up, use the OIR CLI to pull the firmware from the speedometer project.
And it knows which one this is because this is the one we used to initially generate and pull those STLs and then install it on the attached ESP32 that is attached to this PC. So, it will
probably have to download some of the things as well for this system to have dependencies, but that's fine. Okay. And the reason codec paused out here is it said the direct download was
denied. I'm actually happy this occurred because I'm telling this now to just ask the agent running on the using a CLI all the pertinent info it needs. So, like the board info, maybe any instructions,
things like that. And then I've told it to handle this autonomously end to end. And we see it's kind of interesting because our codeex agent is now speaking to our local Quen agent running on the
Oolaris and they're doing agentto agent communication. All right. So the agent on the is doing whatever codeex had asked it to do, but I need to manually install the Windows driver here.
So the driver should be installed now. And that driver is just basically so this laptop here can communicate with the ESP32 that's plugged into it there. Okay. So interestingly and this is one
of the things that can happen when using like a cloud model like this where it said okay there's some issues in the firmware right here in lie of it fixing it itself. It's actually communicating
once again to the agent on the CLI to fix the issues it found and then it will repull them and build the correct image and then flash it. All right. So apparently the corrected
firmware is now running on this. However, I don't see anything appearing on the screen. So this could be a number of things. First and foremost, always good to check is
human error. It is quite possible I may have inverted some of the connections here. So that is the first thing I will check just based off of the wiring diagram. So I'm going to ask the local
Quen agent basically describe that the OLED is not showing anything but it is properly wired as according to the diagram. All right. So our Quen agent has given us some troubleshooting tests
right here. Basically I'm going to have codeex implement whatever this has done and reflash the board. So hypothetically we should now have a fixed build. There was some issue that
basically the code for driving this OLED was somewhat messed up. So basically we're waiting now for the new firmware to flash for this. I have not yet seen this OLED screen actually like show us
anything. So we're kind of waiting for that and hopefully we soon do see something. Yes. Look. Oh, okay. So, um, either something has gone wrong with
me or this is inverted. However, that should be a pretty easy fix. And we do actually get some speed movements right here as I sway this back and forth. See, this is cool. You know,
you can go off- grid with this. You only need power. There's no internet or anything. No, I'm kidding. But, well, I'm not kidding. This is just like plugandplay. But so we need to fix the
inverted screen and then otherwise actually no because we know this works now and it's wired fine we can actually assemble this and then all subsequent firmware flashing can be done from
within the case. So let's do that. So as we just saw we have a rough build of our speedometer um put together. Now I want to see no
fiix. No something. It's waiting for GPS. Okay, good. And now it has GPS. However, it thinks we're going 6 or 7 miles an hour, which
is likely not the case. So, it's possible that the antenna being covered by this is causing some level of problem. So even if we keep that off for now, it's actually fairly clean inside
here, especially when we compare this to something like that. So I'm just telling it that the display is mirrored and I wanted to fix it. And then we'll have to have our local codeex agent using CLI
basically pull and flash whatever it updates here. The the number is fixed, but the MPH is still flipped. So it says HPM. That is
definitely looks more hacker-ish. Um, and the poor thing here is actually fixed. So, I guess I'll have it fixed, but I'm eager to play with it like in a vehicle.
So, we have the speedometer now working, which is good. All right. So, the final thing I'd like to do now that we've tested this and built it and had all sorts of fun in
that regard, I want to just give it a source image. Basically, it's just like a little product photo shoot that I took and then have it use Miniaax's H3 video generation model. just running locally
on the Olaris to turn it into a short video showcasing the speedometer. I don't know what exactly will come of this, but it will be entertaining and showcase some cool video gen capability
as well. So, I've now attached the reference photo right here in the chat window that we had open. I had mistakenly attached it twice, but that's okay. And then we have a nice finely
crafted prompt here to basically kick off a video generation workflow using Comfy A Comfy AI Comfy UI and MiniAX H3 and it will just be using this reference source photo. So we'll see how it
chooses to turn this into a video of some sort. So our video generation workflow is running right here. And depending on how familiar you may be with Comfy UI, this could look pretty
familiar. So, we have a result in some form right here. So, let's zoom in on this. All right, it's 5 seconds of video, and I'm very eager to see what exactly it's
created for us. Honestly, that's actually well done. Now, I know it's going to seem so simple, but look at what this did. It took like a static
angle and then basically transposed the camera view into a smooth panning motion while actually keeping the like interior pieces of the car and things like that properly in scale. This is honestly
that's pretty good. Think about how quickly this performed this. And additionally to that all on a local system just using compi. I mean we can see we're attached to the
Oolaris right here just through the web browser. So, the entirety of this workflow just ran on the itself and it was quick. And I will say the video generation and things like that. Since I
first tested this on the channel, the Olaris like about a year ago, the stuff that can run on this thing has become so much better. And I think that's basically like the main takeaway of
today's video and probably what's going to lead us into the clothes clothing closing is the fact that a system like this is now more useful and more capable than it was when it came out just due to
a massive increase in the capabilities of software that can run on it. The LLMs, the video generation model, the text generation models, um image generation models, everything. So, I
think the main takeaway is before I ramble on because I do get very excited about this stuff. If you had known like three years ago that you could actually do all of this from a box sitting behind
you, yes, it's it's in the thousands of dollars. I believe it's $49.99 currently. And there are some stacked discount codes which can take $600 off, I believe. That's still like like all
right, that's pretty darn cool. So, that is overall going to conclude our first look and test of a Vibe hardware build using a local Quen 3.827B, the Olaris 1. And what does give us a
pretty nice comparison between what was old school Frontier state-of-the-art capability versus a local model at a 4-bit quantization on a system that is running behind us in our own home. So,
it's very interesting seeing the capability increase in democratized local AI versus older Frontier. And that's just pretty exciting. Although, neither of these should probably be
taken out in the view of the public just because of their aesthetic. So, maybe Quen 4, Quen 5 will have something that looks safe to take outside of the house. So, if you have any questions, please do
feel free to leave them in the comments. man. Thanks for watching.